
Create a Membership Site with Paid Memberships Pro – There are many plugins that add membership features to WordPress, We have introduced it several times in our guide. Today I would like to show you how to create a membership site using Paid Memberships Pro, one of the plugins that provides membership features.
Paid Memberships Pro (hereinafter referred to as ‘PMPro’) provides a free version as a standard, and various additional functions are provided as a premium version.
A simple membership site can be built with only the free version without any additional features. In this article, we will proceed with the creation using only the free version.

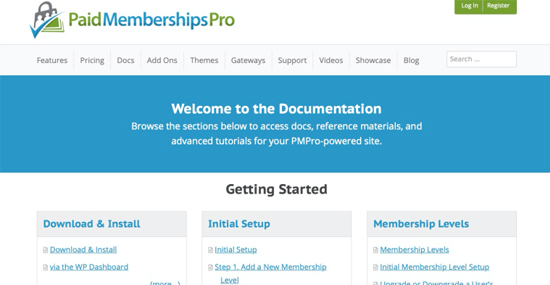
Before that, first of all, if you are curious about how the features of PMPro work, we recommend that you visit the Paid Memberships Pro site. This site, of course, is made with PMPro.
Installing the Paid Memberships Pro (PMPro) Plugin
First of all, you need to install the plugin. PMPro is a plugin registered in the WordPress plugin directory, so you can install it directly from the WordPress admin dashboard.
For reference, this article uses the GeneratePress theme . You are free to work with any theme or theme of your choice.
Once you have installed and activated the plugin, you should now have a menu called “Memberships” added to your dashboard. When you access this menu, you will see various sub-menu tabs.
Add Membership Level
Since it is a membership site, the first thing to do is to create a membership.
You can configure your membership according to the nature of the site. Here, we will add two membership levels by simply dividing them into free members and premium members.
Add your membership level in the “Levels” menu under the “Memberships > Settings” menu.
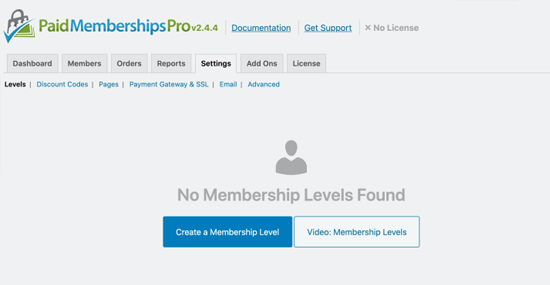
Click the “Create Membership Level” button to set the membership level.
First, create a free member membership.
Next, we’ll add a premium membership. It’s no different from when you added a free member membership earlier, but in the case of a premium member, you’ll have to pay because it’s paid!
Membership fees can be paid on a one-time basis, or can be treated as a subscription model. Here, we set it as a monthly subscription model, and the first month was treated as a trial period so that you can try it for free.

In this way, the membership model was created.

Create a membership page
The next thing to do is create a membership page.
Membership Pages are a set of pages that allow members to access and view their membership account, change their profile, edit or cancel membership.
Membership pages can be created automatically or manually. Click the “Pages” tab in the “Memberships > Settings” menu to display a screen where you can configure and manage membership pages.
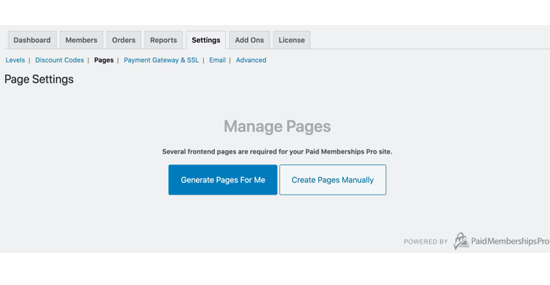
Since we haven’t configured any pages yet, it will come out like the picture above.
There are two ways to configure the membership page: automatic and manual. The difference is that in the automatic mode, PMPro automatically creates basic membership pages, and in the manual mode, the administrator has to do the work himself.
Create a membership page
For simplicity, let’s do it in automatic mode. Just click the “ Generate Pages For Me ” button on the screen.
Then, all the pages required for the membership function are automatically created. If you look at the site menu in this state, you can see that the menu related to membership is already configured.
Join Membership
The login window also includes a “Join Now” link to help you sign up as a member. You can also sign up for a membership by clicking on this “Join Now” link and selecting your membership level. (If you do not see the “Join Now” link, go to “Settings > General” and enable the “Membership” checkbox).
Sign up once!
This will take you to the My Membership Account page. The Membership Account page displays your membership level, your account information, and invoice processing history. Of course, the layout and organization of this page can be modified later.
Related items:
Create membership content
Now that you have the membership features in place, it’s time to create your content.
PMPro provides the ability to set membership access restrictions for each content such as WordPress posts or pages.
Content Settings
Before that, you can go to “Advanced” tab under “Memberships > Settings” menu and do “Content Settings”.
Two options are available. One controls whether to show restricted content on search and archive pages, and the other controls whether or not to show excerpts to non-member users.
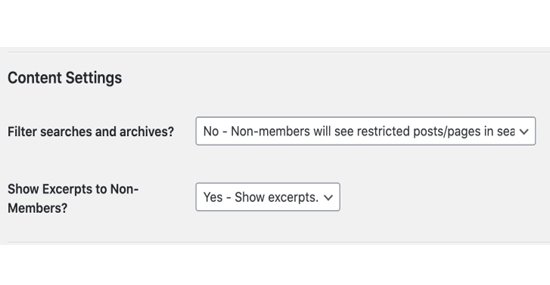
Here, we have changed the archive page and summary so that anyone can see it. I think I will be able to decide whether to buy or not to see anything.
Set Content Access Permissions
In fact, setting access rights for individual content is simple. After installing PMPro, an area for designating membership is added to the sidebar area on the right side of the WordPress post editor window as follows.
You can set access rights to this content here, right? If you want to limit access to free and premium members only, you can check both “Free” and “Premium”.
Back on the site, at the bottom of the listing page it says “This content is for Free and Premium members only.” You can see that “Login” and “Join Now” buttons have been added with the message.
Now only members who have signed up for membership will be able to see it.
etc
There are still some minor corrections left.
For example, you may want to hide the WordPress menu bar that appears at the top of the screen while logged in, or restrict access to WordPress’ default profile page. In this case, you can restrict access to the dashboard in the “Memberships > Settings > Advanced” menu.
Also, you might want to make the menu visible between logged in and logged out users different. For example, we want the membership account page to be visible only to logged-in users. In this case, PMPro does not provide the function yet, so it is better to solve it with another plugin.
Related items:
- Sensei Pro (WC Paid Courses) Plugin Free Download
- Sensei LMS Content Drip Addon by Automattic Free Download
- SEOPress PRO WordPress Plugin Free Downloads
- W3 Total Cache PRO WordPress Plugin Free Download
- WP Rocket Premium WordPress Plugin Free Download
You can use plugins like User Menus – Nav Menu Visibility to add conditions to your WordPress navigation menus . Then you can modify the menu so that it is only visible to the logged-in user in the menu settings.
In addition, this User Menus plugin provides login, logout, and register menus by itself, so you can use it conveniently when creating menus. If you use the menus provided by PMPro and the menus provided by User Menus (User Links) together, you can process more diverse menus.
Very nice post. I just stumbled upon your blog and wanted to say that I’ve really enjoyed browsing your blog posts. In any case I’ll be subscribing to your feed and I hope you write again soon!